Reverse Engineering Vulnserver.exe
I choose one more vulnerable application to perform reverse engineering and discover vulnerablities if you want to follow along you can download here vulnserver App .
When reverse engineering the crucial part before starting is enumerating the application for entry points (locations where you can input data), for example TCP/UDP Ports, Files, Configuration Files, Windows Registry Keys etc… after enumerating the target application on all possible entry points, you need to decide and pick one to start.
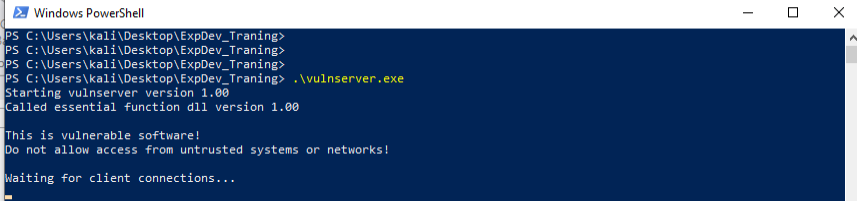
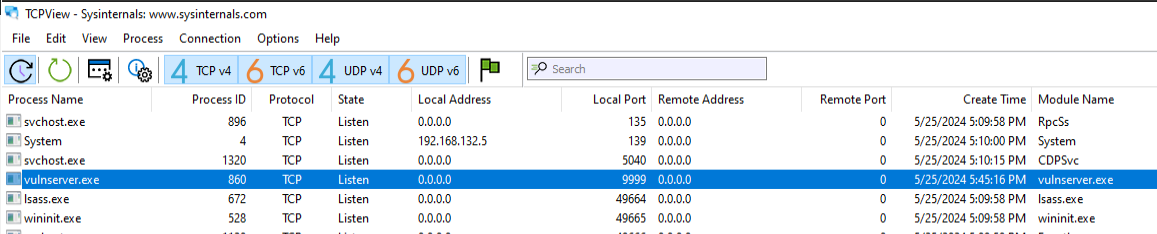
Since this is a small application designed for you to learn exploit development, you will find quickly that the application is listening on port 9999 after running it and opening TCPView, you can download here sysintenal tools
Now we need to send a dummy packet and analyze the code flow using a combination of static analysis technique and dynamic analysis. The tools I used is windbg debugger for dynamic analysis tool and IDA Free for static analysis. We need to know which function to hook, we can use IDA Free and open vulnserver.exe and see the imported function (imports tab). The function commonly used for networking is the recv function for TCP protocol.

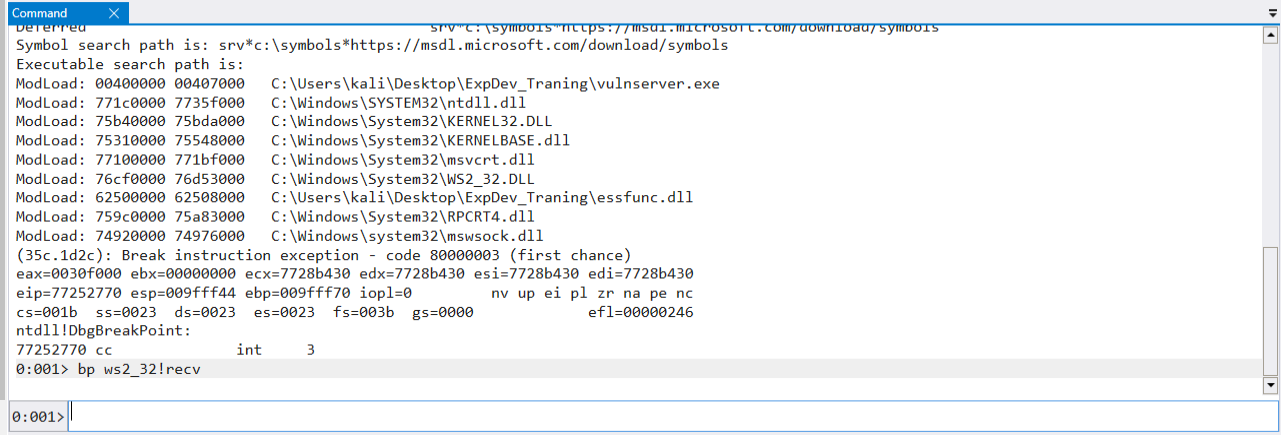
Hooking the recv function, we just need to open windbg debugger and attach to process “vulnserver.exe” and set a breakpoint as showing below.
bp ws2_32!recv
Now we need to send a dummy packet, for that you can use this small piece of python code.
You can run the code like: python poc-vulnserver.py IP
Ex.: python poc-vulnserver.py 192.168.132.10
import socket
import sys

def main():

    if len(sys.argv) != 2:
        print("Usage: %s <ip_address>\n" % (sys.argv[0]))
        sys.exit(1)

    server = sys.argv[1]
    port = 9999

    buf = bytearray([0x41]*0x100)
    s = socket.socket(socket.AF_INET, socket.SOCK_STREAM)
    s.connect((server,port))
    s.send(buf)
    resp = s.recv(1024)
    print("Response: ",resp)
    s.close()


if __name__ == '__main__':
    main()
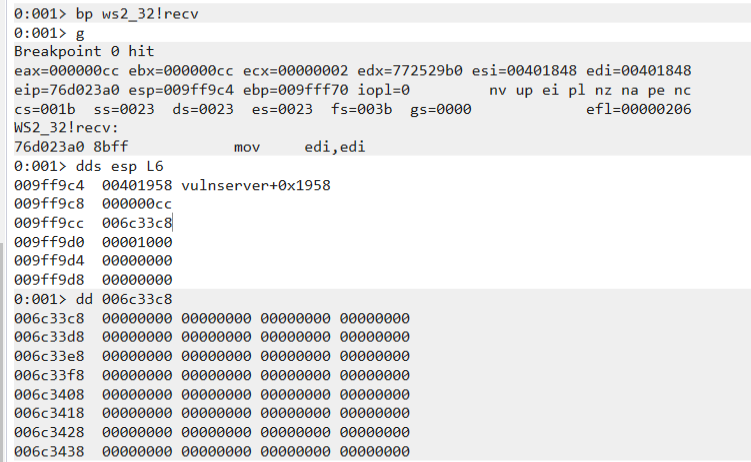
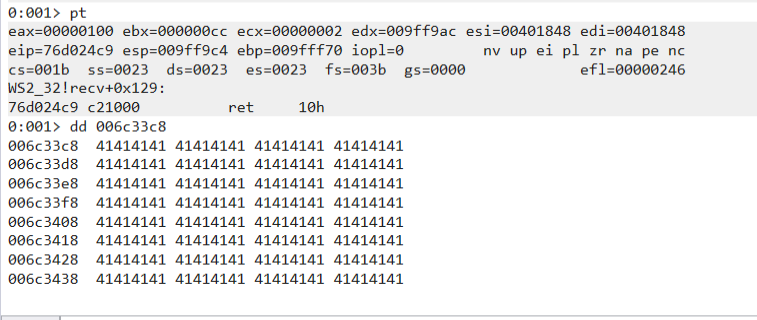
You can see below our breakpoint getting hit and the memory address for our buffer is at 0x006c33c8 which is empty right now after issuing the dd command to display data in a double word (4 bytes). Your memory address will probably be different.
You can use the pt command to stop at the return address of the current function and check the memory address 0x006c33c8 again and we should see our 0x41 values.
Now next step is to single step using the p command and follow using IDA Free, you can download IDA here Installing IDA is very simple, after installing IDA you can open the vulnserver.exe with IDA Free.
Click on “New Button” and open vulnserver.exe and wait to fully disassemble.
Note.: Disassemble is the process of transforming machine code into assembler code (low level assembly language). Read More Here

Now with windbg, you can enter the p command and hit enter.
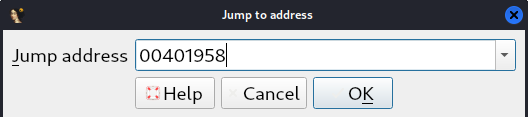
Now copy the memory address on the left that shows on the “sub esp,10h” instruction.
Go to IDA and hit the “g” keyword on your keyboard to “Jump to address” and paste the addresss as showing below and click Ok.
Note.: If the memory address doesn’t match in IDA, you can change, “Got to Edit -> Segments -> Rebase Program…”. You can locate the base memory address by running the following command in windbg: lm m vulnserver. You can reach out to me if you have any question. If you are not seeing the address in IDA Free you can enable by going to “Options -> General -> Line prefixes (graph)” and click on OK button.
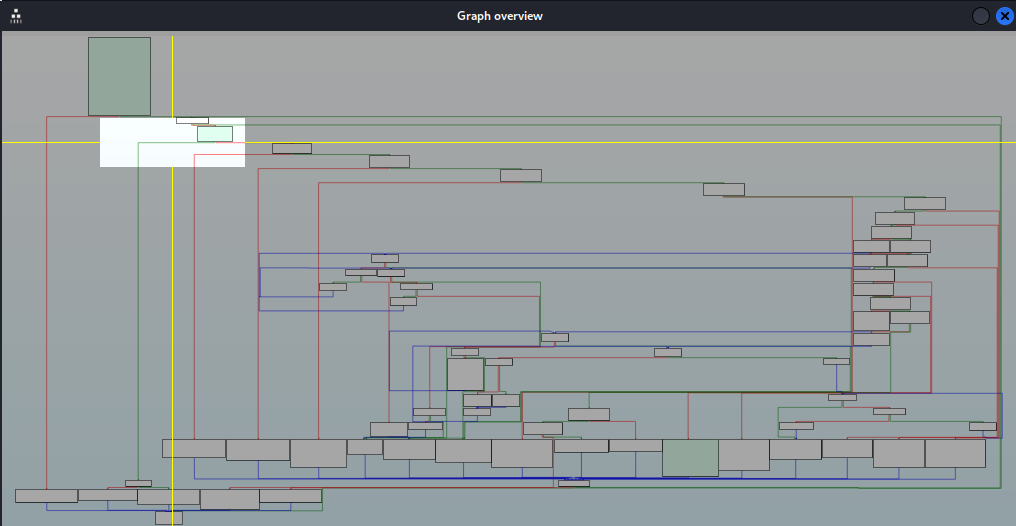
Now we landed at memory address: 0x401958 in IDA Free and we can follow along with Windbg. By looking at Graph overview in IDA we see this function is quite large with a good amount of if and else condition.
We can continue to step through in Windbg debugger using the p command, we see at the address 0x00401961 it compares the size of our payload 0x100 against the value 0 and it checks if is less or equal to 0, we don’t take this jump and continue to the next branch.
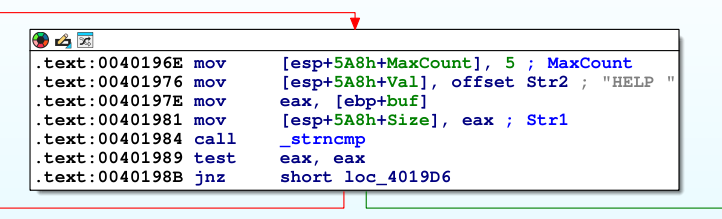
We see a series of branches basically performing the same thing only changing the “offset Str2”, for example the one below has a string called “HELP " and our buffer is stored in eax later copied to the stack along with the “HELP " string as arguments for the function strncmp. the strncmp will compare first 4 bytes of our payload with the string “HELP " and if equal, we take false branch (red) color, if not equal the comparison is true so we take the green arrow.
After reviewing the whole function we see the behaviour is the same, the first 4 bytes of our payload is compared against multiple strings which represents specific functionalities in the software. If the 4 bytes matches with the string supplied by our buffer the functionality is performed. What we need to do is to review each block for possible vulnerabilities and attempt to trigger via custom crafted packet.
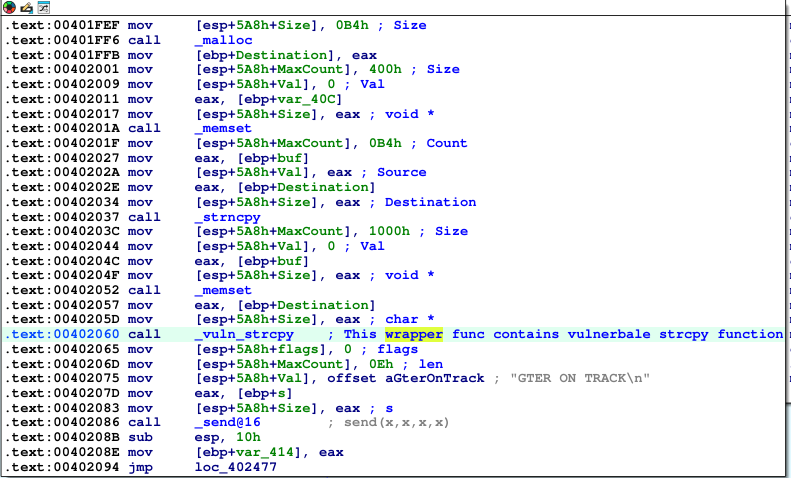
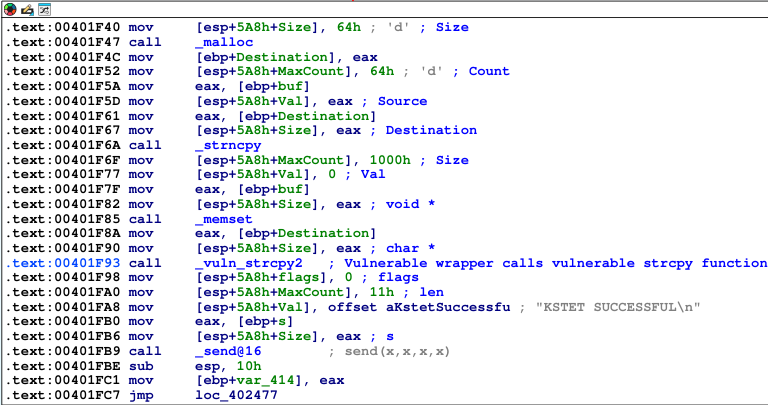
I found several functionalities vulnerable to buffer overflow due to the code not using the safe strcpy function which does not take the size in consideration only destination and source address are used if destination is larger than source address will result in writing out of bounds data into the buffer. I will show you only two examples.
The first string of our example that triggers the vulnerablity is “GTER " string which lead us to the vulnerable code path at 0x00402060, I renamed in IDA Free to “_vuln_strcpy” function. If you update the poc code above to send a string “GTER " followed by a long string you should be able to overwrite the return address and control EIP.
The second string is “KSTET " which triggers the code path to the vulnerable function which I renamed to “_vuln_strcpy2”.
I hope that you enjoyed and this could help anybody trying to learn reverse engineering 😄